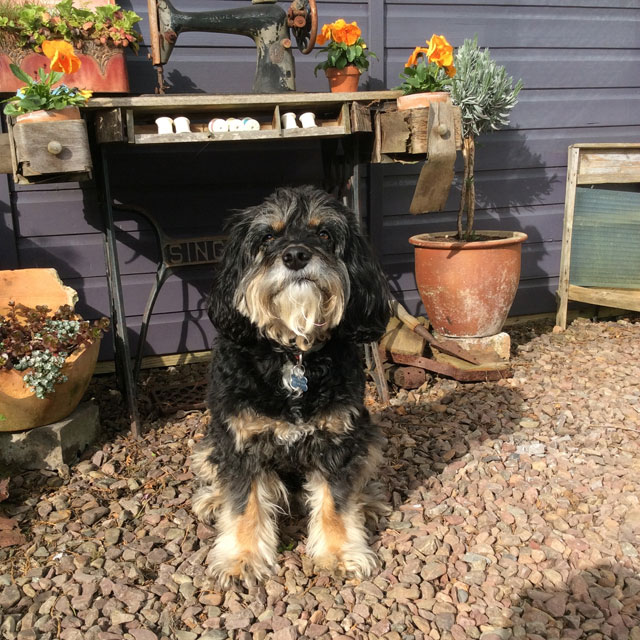
Laundry Tales – Rules for Ironing – a new Workshop in a Box

Oh my goodness that was quick!!

Sorry but these are all SOLD – Thank you SO much for the response!

A gorgeous box of goodies that will arrive through the post!

Aimed at stitchers with a love of vintage

At long last it’s time for a new Workshop in a Box so introducing the second in my series of ‘Laundry Tales’  – Rules for Ironing. I do so hope  you love it! It’s designed to sit beautifully alongside the first but equally it looks just gorgeous on its own.

I aim for these boxes to fall somewhere between an inspiration pack and a kit, so my expectation isn’t for you to make an exact replica of the piece pictured below, though by using the materials provided, working through the Making Notes and referring to the diagram and picture you can, of course, do so.

I’ll walk you through the stages I took during the making of my lovely Cloth Collage, explaining some of the whys as well as the hows! But I absolutely encourage you to personalise my design and I offer suggestions along the way.

Laundry Tales Story Collage – Rules for Ironing

To inspire & delight

The aim of these boxes is a simple one – to inspire & delight – in fact it’s become a bit of a mission statement.

I prepare everything in the box myself, as I would for a workshop and I love the thought of you rummaging through it!

The prep is completely ‘low tech‘, with everything done by hand which is incredibly time consuming, intensely satisfying and, in my opinion, rather beautiful. This is just one of the reasons why numbers are limited.
Tapes are typed by hand on my vintage typewriter that belonged to my mother-in-law.

The story behind

The inspiration behind Laundry Tales is an old domestic science jotter that a very lovely workshop friend found in her local charity shop and then very kindly gifted to me. This wonderful friend is clearly much more generous in spirit than me –  I’m afraid I would never have parted with it!

Anyway it belonged to a girl called Patsy who had the most beautiful handwriting, and generally scored 9 or 10/10 for her exercises. I do wonder if she is still using the skills that she learned at school such as making starch and polishing collars – probably not but I’ll be very disappointed if she doesn’t still follow her eight ‘Rules for Ironing’!

Reading through the jotter makes me smile and invokes a sense of nostalgia as I remember wash day as a child. I’m not of the age where we had to set the fire & fill the copper, but it took a whole day, was always on a Monday and I did enjoy hauling the continuous tangle of washing out of the twin tub with a pair of wooden tongs. A pair of tights could double in length resulting in wrinkles round the ankles every time you wore them! Mind you I’m very aware that those of us with these nostalgic memories were not the ones actually doing all the hard work but what fun to run between the sheets as they blew on the line…until you were caught that is!

The inspiration came from an old domestic science jotter belonging to a girl named Patsy

The most beautiful  fabrics…

If you know anything about me, you’ll know that my passion lies in using materials that are used, washed & worn however, for my workshop boxes, I soon realised that this was really limiting me and that the only way I could create gorgeous ‘Cloth Collage’ boxes was to use new fabrics.

I searched around for vintage inspired fabrics and became more than a little smitten by French General, who design beautiful cloth inspired by their antique French collections. For this box, I have chosen pieces from their La Vie Boheme collection and I’ve loved working with them! I’ve always been drawn to a Paisley pattern and incidentally spent a happy hour while stitching my sample listening to a wonderful Haptic & Hue podcast about the history of the Paisley design – so worth checking out if you have time (as well as all their other amazing episodes). Anyway I completely digress. I’ve also added a beautiful blue floral pattern by Morris & Co and you may recognise it if you already have my first Laundry Tales box. When I am creating a series of work, I often replicate some of the fabrics & threads in my pieces so that they connect with but complement each other beautifully.

I’ve also included a page of my treasured jotter, digitally printed onto organic calico, providing a lovely piece of fabric text for you to work with.

Old, new, washed & worn, ripped & torn

Old, washed & worn

But of course there are also scraps of gorgeous old fabrics & haberdashery. The background to your Story Collage is a piece of vintage mangle cloth with that oh so beautiful red stripe. I’m a bit obsessed with these lovely long lengths of linen. Your background may not be exactly the same as the one pictured, but I can promise you that they’re all equally delicious!

However using vintage does mean that there may be marks on some of the fabrics, or they may be faded or slightly damaged. I only include pieces that I would choose to work with myself – but be warned, I make a bee-line for the wonky and imperfect like these glorious checked hexagons unpicked from an old patchwork quilt.

Your finished Story Collage can be hung from the bulldog clips provided or you could also mount and frame it in your own way.

Hang things of a kind together…

I’m so hoping that you’ll enjoy using bits & pieces that I’ve collected together for you but also hope that you’ll personalise your own story collage by adding wonderful stuff from your own stash!

Many of my followers on social media and in person are already enthusiastic and often experienced stitchers so this box is aimed at them. Anyone who is not familiar with any of the stitches used can look for online tutorials, or even better in my opinion, invest in an embroidery stitch book. I love collecting vintage of course and still use my very first sewing book “Embroidery Stitches’ by Barbara Snook. But the stitches used are simple and I very much encourage an intuitive approach.

See that lines and pegs are clean

The finished dimension is around 32 x 32cm – but don’t expect straight edges!

Also please note that my style of stitching (and therefore teaching) uses torn, unfinished edges so if you embrace the perfectly turned edge then this one probably isn’t for you! If you already have my first Laundry Tales Workshop in a Box please be aware that the making process for this one is very similar.

To inspire and delight…

To Order

There is a limited number of 50 Laundry Tales boxes available and I will be posting them out in small batches over a couple of weeks. Please order by contacting me by email. I don’t always receive messages left on my Facebook & Instagram accounts, so please do email!

Payment will be by BACS or Paypal.

The cost of the box is £50 plus UK postage of £4.00

I am so sorry but I am not posting out-with the UK.

I know this will disappoint and I truly apologise but parcels have gone astray and I end up out of pocket so please be understanding!

I hope you love it and I can’t wait to see pictures of the results!


Stories from the Sewing Room – a new Workshop in a Box

Wow that was a response and a half!

I’m sorry but these flew off the shelves and are now SOLD OUT!

A gorgeous box of goodies that will arrive through the post!

Aimed at stitchers with some experience and a love of vintage

Oh my goodness I have been promising this one for a long time but I’m finally ready to launch my latest Workshop in a Box. Last year was a funny old year where plans changed and new things came along and this box just never materialised…I do so hope it’s worth the wait.

Orders are now open for ‘Stories from the Sewing Room’ – a rather lovely Cloth Collage.

Available February 2022 – Stories from the Sewing Room – Cloth Collage

I aim for these boxes to fall somewhere between an inspiration pack and a kit, so my expectation isn’t for you to make an exact replica of the piece pictured above, though by using the materials provided, working through the Making Notes and referring to the diagram and picture you can, of course, do so. Be warned though that the fragments of vintage table linens included in your box may not be the same size or shape as mine, so you’ll probably have to make some adjustments along the way.

I’ll walk you through the stages I took during the making of the lovely Cloth Collage above, explaining some of the whys as well as the hows! But I absolutely encourage you to personalise my design and I offer suggestions along the way.

Enjoy creating a gorgeously scrappy cloth collage inspired by memories of stitching

To inspire & delight

The aim of these boxes is a simple one – to inspire & delight – in fact it’s become a bit of a mission statement.

I prepare everything in the box myself, as I would for a workshop and I love the thought of you rummaging through it!

The prep is completely ‘low tech‘, with everything done by hand which is incredibly time consuming, intensely satisfying and, in my opinion, rather beautiful. This is just one of the reasons why numbers are limited. 
Tapes are typed by me using my mother in law’s old typewriter

The story behind

So many stitchers have fond memories of sewing as a child, or of playing with their granny’s button box. My granny was the worst stitcher on the planet according to my mum, but of course that didn’t stop her, as ‘needs must’! Somehow my mum taught herself to sew, and she is a very wonderful stitcher. She made all my clothes when I was wee and generally my dolls would also have an outfit made from the fabric scraps. They lived much more exciting lives than me – I never had the need for the skater skirt and fur trimmed jacket worn by my Sindy doll, or the Spy outfit, complete with flower in the lapel (that was really a camera) that my teddy discretely wore!

I remember playing with mum’s button tin, spending hours sorting buttons by colour or size and of course learning to sew as soon as I could. In primary school I made my first dress, a tennis dress made of white waffle cotton. I think there was even a pair of shorts to match. I never did wear it, as I didn’t actually play tennis (what was I thinking), but it had a long zip down the back and side slits and I’ll never forget it!

What did sewing mean in your household? Was it ‘plain’ sewing or ‘fancy’ needlework? Perhaps it was dressmaking, embroidery, sewing on missing buttons or name labels on clothing.  Maybe the sewing basket overflowed with mending, everything from stockings to sheets. Keeping these things in mind as you start your collage may well inspire personal touches you could incorporate in your stitching. You could add little areas of decorative darning, a row of buttons or maybe some words.

Don’t worry if you don’t have sewing background and don’t have your own memories. My own work usually draws on the stories of others and I ‘borrow’ words & stories from everywhere!

Inspired by childhood memories of sewing and school notes belonging to a girl named Patsy

The most beautiful floral fabrics…

If you know anything about me, you’ll know that my passion lies in using materials that are used, washed & worn however, for my workshop boxes, I soon realised that this was really limiting me and that the only way I could create gorgeous ‘Cloth Collage’ boxes was to use new fabrics.

I searched around for vintage inspired fabrics and became more than a little smitten by French General, who design beautiful cloth inspired by their antique French collections. For this box, I have chosen pieces from their Jardin de Fleurs collection and I have absolutely loved working with them! For someone who rarely uses new fabric, I could play around with these for hours…and unashamedly have done!

I loved this fabric range so much that I just couldn’t decide between two of the colours – so you’ll have to choose! The decision is yours whether you wish to order a box in Colour way 1 ‘Roche’ or Colour way 2 ‘Blue’. Do remember to let me know which you would like when you order. There will be limited numbers of both, so get in touch quickly to get your first choice.

Choose between colour way 1 Roche


or colour way 2 Blue

Of course there are also a few pieces of old fabric – this does mean that there may be marks on some, or they may be faded or slightly damaged. I only include pieces that I would choose to work with myself – but be warned, I make a bee-line for the wonky and imperfect!

Please note that my style of stitching (and therefore teaching) uses torn, unfinished edges so if you embrace straight lines, perfectly turned edges & pristine fabrics, then this one probably isn’t for you!

The printed text is from an old domestic science jotter that I’ve had digitally printed on organic calico. It belonged to a girl called Patsy who had the most beautiful handwriting and scored 5/5 for this exercise so you can rely on her instructions for the stitching of seams!

Your finished piece can be hung as it is from tiny bulldog clips (provided), or of course you could always mount it and frame.

The finished dimensions are around 22cm 32cm.

You can follow my placement of ‘patches’ or create your own layout

I’m so hoping that you’ll enjoy using bits & pieces that I’ve collected together for you but also hope that you’ll personalise your own story collage by adding wonderful stuff from your own stash!

Many of my followers on social media and in person are already enthusiastic and often experienced stitchers so this box is aimed at them. Anyone who is not familiar with any of the stitches used can look for online tutorials, or even better in my opinion, invest in an embroidery stitch book. I love collecting vintage books and still use my very first sewing book “Embroidery Stitches’ by Barbara Snook. But the stitches used are simple and I very much encourage an intuitive approach and be reassured, you can make a very beautiful Cloth Collage using only running & cross stitch!

Another layout, this time using the gorgeous blue colour way


put all the money you can afford into good materials

To Order

There is a limited number of 50 Stories from the Sewing Room boxes available and I will be posting them out in small batches over a couple of weeks from the 16th February. Please order by contacting me by email. I don’t always receive messages left on my Facebook & Instagram accounts, so please do email!

Payment will be by BACS or Paypal.

Remember to tell me if you wish Colour way 1 ‘Roche’ or 2 ‘Blue’. Also tell me if you are willing to have the other colour if your chosen one is not available.

The cost of the box is £50 plus UK postage of £4.00

I am so sorry but I am not posting out-with the UK.

I know this will disappoint and I truly apologise but parcels have gone astray and I end up out of pocket so please be understanding!

I hope you love it and I can’t wait to see pictures of the results!


Laundry Tales – a new Workshop in a Box

So sorry – though I’m actually delighted – but these went super fast! Orders halted for now!

A gorgeous box of goodies that will arrive through the post!

Aimed at stitchers with a love of vintage

At long last I’m ready to launch my latest Workshop in a Box and I’m keeping everything crossed that you’re going to love it! Pre-orders open on Monday 3rd May for ‘Laundry Tales’ – a rather lovely Story Collage.

I aim for these boxes to fall somewhere between an inspiration pack and a kit, so my expectation isn’t for you to make an exact replica of the piece pictured below, though by using the materials provided, working through the Making Notes and referring to the diagram and picture you can, of course, do so.

I absolutely encourage you to personalise my design and I’ll offer suggestions along the way.

Available May 2021 – Laundry Tales Story Collage

To inspire & delight

The aim of these boxes is a simple one – to inspire & delight – in fact it’s become a bit of a mission statement.

I prepare everything in the box myself, as I would for a workshop and I love the thought of you rummaging through it!

The prep is completely ‘low tech‘, with everything done by hand which is incredibly time consuming, intensely satisfying and, in my opinion, rather beautiful. This is just one of the reasons why numbers are limited.
Tapes are typed by hand on my vintage typewriter that belonged to my mother-in-law.

The story behind

The inspiration behind Laundry Tales is an old domestic science jotter that a very lovely workshop friend found in her local charity shop and then very kindly gifted to me. I know –  I’m afraid I would never part with it, if it were me that had found it!!

Anyway it belonged to a girl named Patsy. I don’t know her age, but she did have the most beautiful handwriting so I’m guessing she was almost old enough to step out into the big wide world of starching and ironing frilled pillow cases, stiffening and polishing shirt collars and calculating the weeks food budget for a family of five consisting of an active man, a woman doing house work, a boy of 14, girl of 12 and boy of 8. I’m hoping that the woman doing the housework was on double rations if this book is anything to go by, but sadly I suspect not!

However, the jotter pages are in pretty good condition, they don’t look well thumbed so maybe she tossed the jotter and escaped this life for something more exciting! The very last page contains some intriguing and totally unrelated notes. I’m guessing that Patsy consulted a fortune teller – how daring!! So maybe Dame Fortune did indeed cross her path  leading to a life of Travel, following a legal or medical path, maybe the young blond gent did bring pleasant news. Lets hope she did beware of the middle aged woman (the domestic science teacher perhaps) and the insincere relative! 

But we’ll never know if she did or not, that’s the beauty of these wonderful old treasures, I never find out the real story, but they spark such a lively picture in my own mind that I have no need or wish to!

The inspiration came from an old domestic science jotter belonging to a girl named Patsy

Used, washed & worn, ripped & torn…and new?!

If you know anything about me, you’ll know that my passion is in using materials that are used, washed & worn.  There’s an energy & vibrancy in old textiles, we may never know where they came from, and just like Patsy’s story, we may never know their real stories but they prick at our memories, capture our imaginations and stir our emotions.

Wherever possible I use vintage materials in all of my Workshops in a Box.  However this does mean that there may be marks on some of the fabrics, or they may be faded or slightly damaged. I only include pieces that I would choose to work with myself – but be warned, I make a bee-line for the wonky and imperfect!

However, I realised that by only using old, I am really restricting the designs that I’m able to offer for my Workshops in a Box. So I am also now embracing the new!! The printed fabrics are therefore new – chosen specially for their vintage style and because they sit so beautifully alongside the old. I’ve also included a page of my treasured jotter, digitally printed onto organic calico, providing a lovely piece of fabric text for you to work with.

Old, new, washed & worn, ripped & torn

But of course there are also scraps of gorgeous old fabrics. The background to your Story Collage is a piece of vintage mangle cloth with that oh so gorgeous red stripe. I have a bit of a ‘thing’ for these lovely long lengths of linen. I’m using three different pieces of cloth in these boxes so your background may not be exactly the same as the one pictured, but I can promise you that they’re all equally delicious! And just like any Wash Day you have whites as well as coloureds so you’ll  find a selection of vintage whites – shirting fabric and  old table linens.

Your finished Story Collage hangs from two vintage clothes pegs, echoing beautifully the stitched clothes peg outlines in the design, or you could also mount and frame it in your own way.

A page from the jotter is digitally printed onto organic calico

I’m so hoping that you’ll enjoy using bits & pieces that I’ve collected together for you but also hope that you’ll personalise your own story collage by adding wonderful stuff from your own stash!

Many of my followers on social media and in person are already enthusiastic and often experienced stitchers so this box is aimed at them. Anyone who is not familiar with any of the stitches used can look for online tutorials, or even better in my opinion, invest in an embroidery stitch book. I love collecting vintage of course and still use my very first sewing book “Embroidery Stitches’ by Barbara Snook. But the stitches used are simple and I very much encourage an intuitive approach.

Stand with back to the wind

The finished dimensions are around 22 x 32cm – but don’t expect straight edges! Also please note that my style of stitching (and therefore teaching) uses torn, unfinished edges so if you embrace the perfectly turned edge then this one probably isn’t for you!

This Laundry Tales Workshop in a Box is the first in a series – there will be more to follow at some point – because I just love to work in a series!

Hang colours & woollens in the shade

To Order

There will initially be a limited number of 30 Laundry Tales boxes available (although I will be offering 20 more later) and I will be posting them out in small batches from 10th May and throughout that week. You can pre-order a box from today Monday 3rd May by contacting me by email. Payment will be by Paypal or BACS.

The cost of the box is £45 plus UK postage of £4.00

I am so sorry but I am currently not posting to Europe. I know this will disappoint and I truly apologise.

I may be able to post to other countries at cost but be warned it can be crazy expensive – just drop me a line!

I hope you love it and I can’t wait to see pictures of the results!


The Story Behind The Piece: Textile Tokens

Love Tokens

You have no conception just how much I miss you.

Meet Jimmy & Peggy

‘I just wish each and every hour away, and yet still they drag’

I was utterly captivated the very first time I read these words and I became a bit smitten with the author and her husband. They’re lifted from a small collection of Jimmy & Peggy’s personal letters that came into my possession a few years ago. The letters were the inspiration behind my series ‘Stolen Stories’. I’ve written about my thought and making process behind these pieces, in an article for TextileArtist. org. – ‘From Conception to Creation’. Do grab a cuppa and have a wee read if you’ve got a minute!

‘Stolen Stories’ Fragments of private emotion pinned out for all to see

So who are Jimmy & Peggy?

To be honest I know very little about them except that they are a young (I assume) fairly newly married couple living in wartime Britain. I have five letters dated between 1942 & 1946. Where the rest of their letters are, I have no idea but as they wrote to each other several times a week there must be many! They were both based in this country but separated by circumstance for the most part. I only have tiny glimpses into their story and the rest is purely in my mind. I’m not quite sure why they fascinate me so much, the letters are pretty mundane but that’s what I love about them.

Every-day people, ordinary lives, extraordinary times!

Your sweet voice is a comfort to me

Then 2020 happened!

So then last year happened and like everyone my world turned upside down when we went into ‘lockdown’ – a word that most of us had no previous use of. I noticed that my regular phone conversations with my 87 year old mum inevitably led to her recollecting her childhood years living through WWII. She’d end each conversation  with the words:

‘at least we don’t have bombs dropping all around us’.

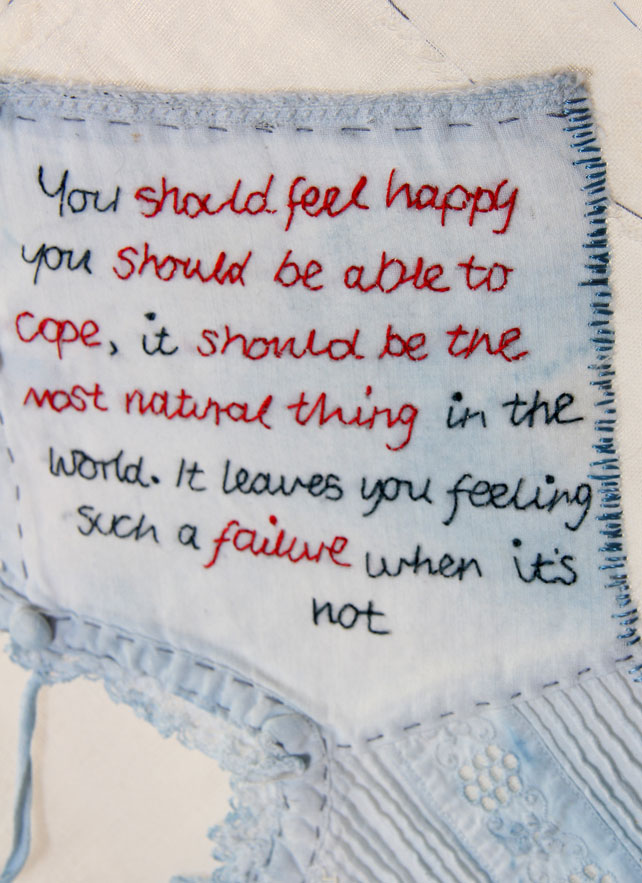
I can always rely on my mum for putting my own troubles back in perspective! However these conversations led me once more back to Jimmy & Peggy and their words to one another. Returning  to their letters, so many words and phrases struck a chord with me. This time I didn’t feel as if I was the outsider looking in to their private world, instead it felt like they could see right into mine and were reading the thoughts and emotions that were tumbling around inside me.

So I started stitching.

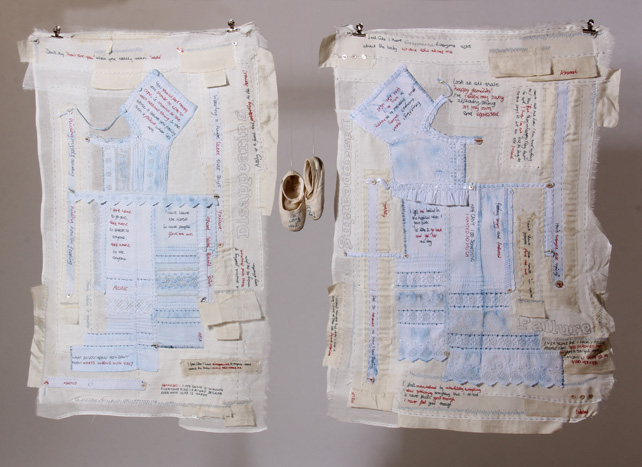
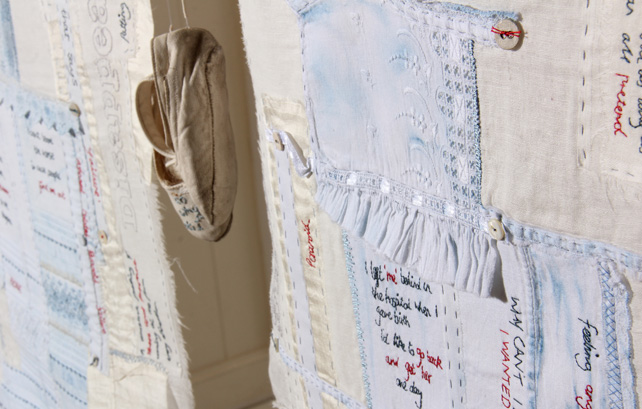
Captivated by their letters once more, I started working on a couple of bigger pieces inspired by Peggy & Jimmy’s story. With workshops (my income) being cancelled and money being refunded I found it strangely calming and there was something rather lovely about having the time (oh so much time) to work on bigger pieces again.

‘Missing You” Work in progress

Funnily enough these pieces were never finished. They came to an abrupt halt for some reason and I can’t even remember why. With hours and days of stitching behind me, I just suddenly stopped – maybe that was when the gorgeous weather came our way and my rather frenzied attention turned to the garden. Who knows – but they’re in my thoughts again so I’ll turn back to them soon.

Textile Tokens

When the bigger pieces became daunting, my attention turned to working small, very small. I’ve been fascinated by the idea of making Textile Tokens ever since visiting the Threads of Feeling exhibition at The Foundling Museum in London back in 2010. No time to tell the story of that here but that one afternoon played a pivotal role in the clarity and direction of my own textile practice.

I remember standing silently looking at each exhibit with tears rolling down my face, and I wasn’t alone. I’ve no idea how much time I spent there as each piece claimed my full presence and attention. So much emotion, so many stories held in these little scraps of fabric. The stories remained hidden but the emotion was raw and real and felt by very visitor there.

Darling keep your spirits up and just be patient

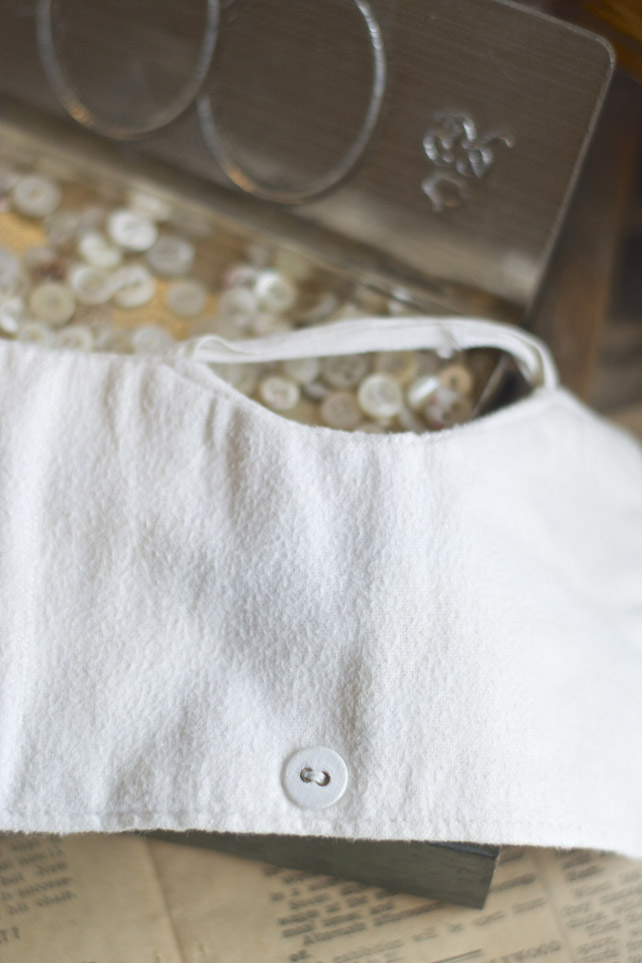
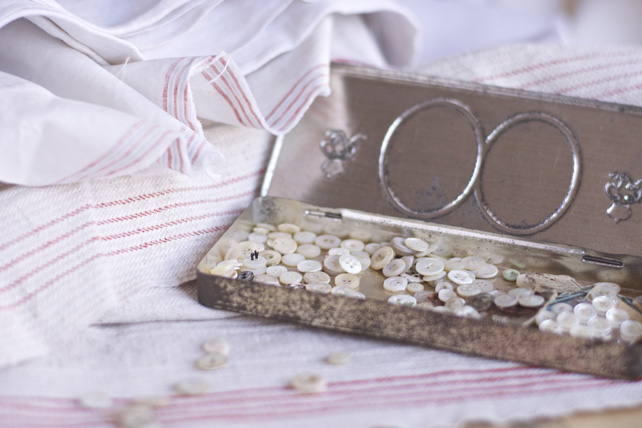
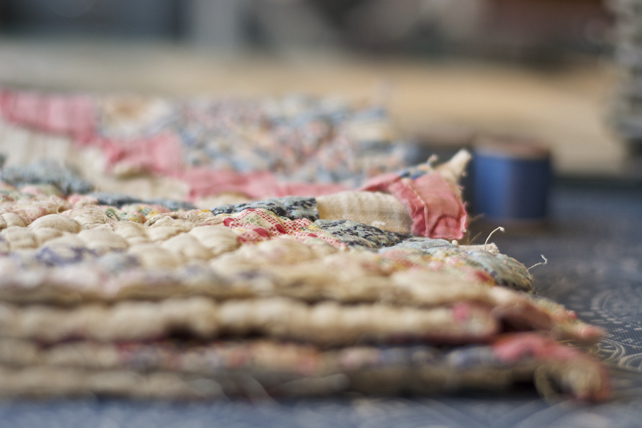
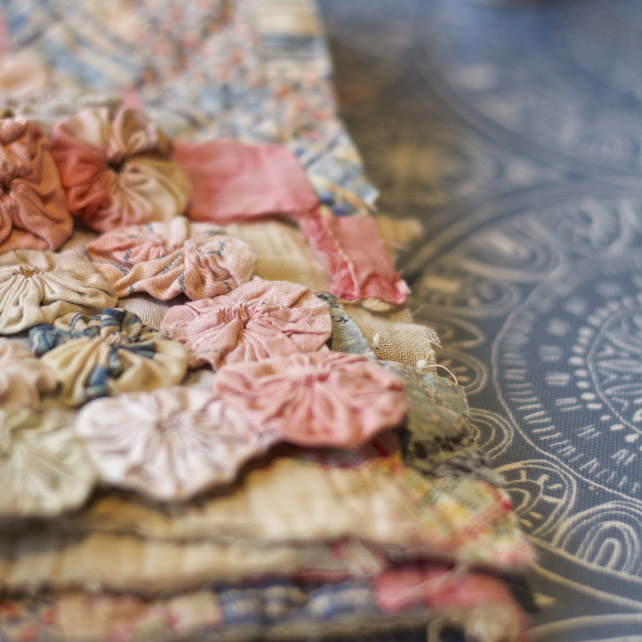
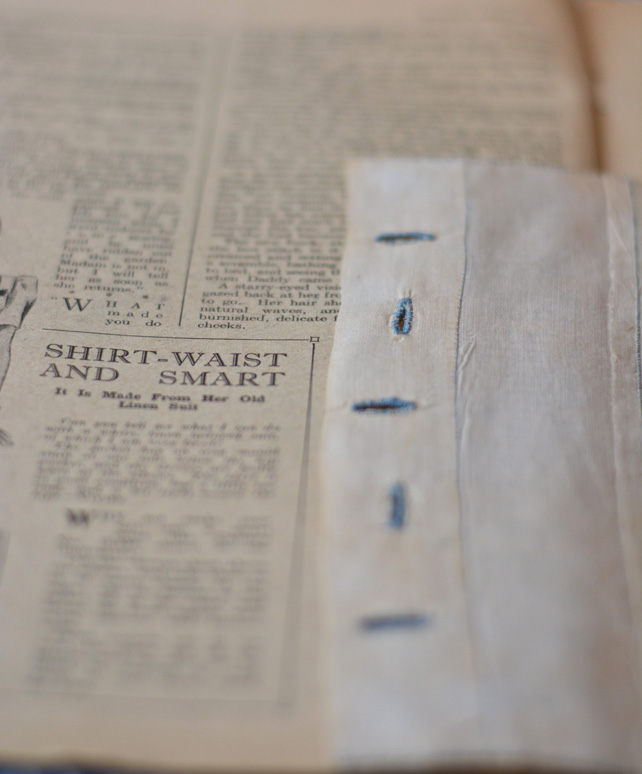
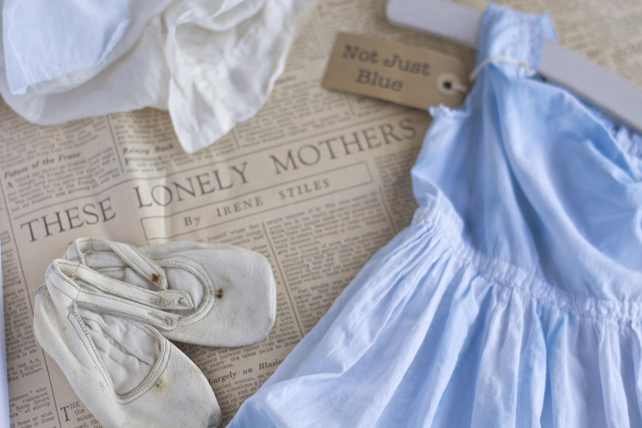
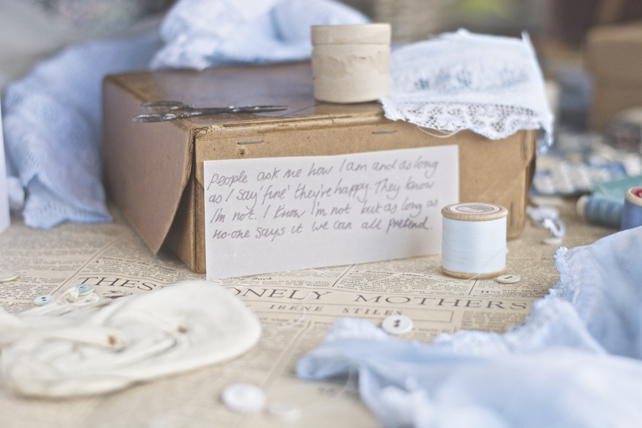
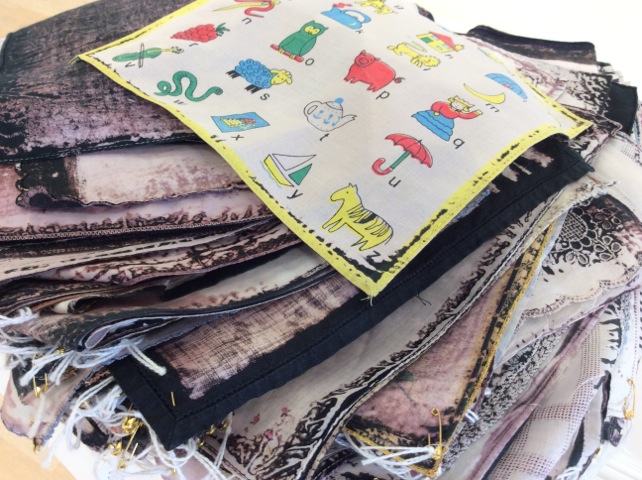
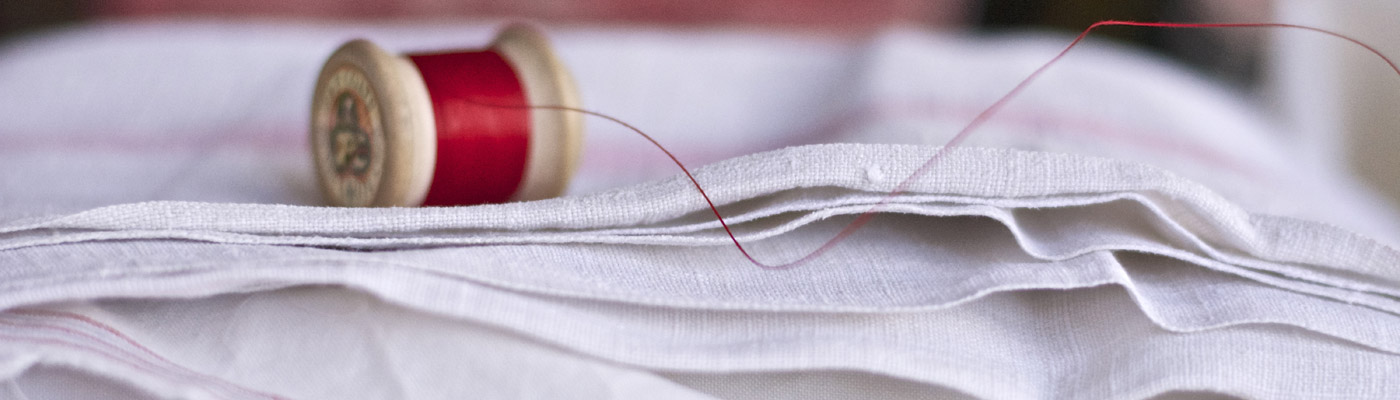
So I decided to combine the energy of scraps of old fabric – mostly from a piece of 1940s feed sack quilt that was so washed and worn that I could tear it into fragments with my hands – and the energy of Peggy & Jimmy’s words, suddenly so relevant.    I chose whatever phrase spoke to me at the time and stitched it on silk organza and these tiny scraps of homely fabrics. Stitched intuitively with vintage threads, they became my soothing activity – comforting and healing as my heart ached with missing my special people. I picked them up and set them down just as the mood took me.

I gave some away and the others are now pinned into a little sketchbook. I know that they will become part of something bigger but I’m not quite sure what yet. Having harboured a sense of guilt over lifting words out of context in my series Stolen Stories I have a notion that I want to put the story straight and perhaps create a display case containing the real loving energy of this couple.

God bless you my love and keep you from harm

I became busy with other projects at the end of last summer and didn’t do any more until that brutal Saturday just before Christmas when our longed for plans were wiped off the table. Once more we had to re-adjust, re-compose and re-gather our energies.

So stitching started again.

Love Tokens

Having found a level of acceptance again I’ve been spending peaceful evenings, contentedly stitching once more. I’d had a few enquiries about my tokens whenever I posted them on Facebook & Instagram so I decided to stitch a very small collection and offer them for sale.

These ones have fewer words but focussing on love as it’s the force that’s holding us together at this time, when everything that we are wishing for still seems so far away.

My sweet darling

The words are hand stitched on silk organza, on a background of 1940s quilt and fragments of antique French textiles. They’re worn, torn and marked (aren’t we all?) and each one is decorate with tiny stitches in vintage threads. They’re individually made, I don’t work on a few at a time for speed, and they’re stitched with a contented heart in front of the fire, safe at home (with no bombs dropping round about us).

I just wish

The tokens themselves are small – each one measuring about 9cm x 7 cm and they’re stitched onto a square cream cardboard mount. Exact sizes will be given on individual listings. The tokens can easily be removed from the card to display as you wish – I personally love them displayed in a gorgeous Nkuku zinc & glass frame (5 x 7 landscape is perfect).

My dearest

These Love Tokens will be offered for sale on my Facebook & Instagram pages from Thursday 28th.

There are currently only seven available.

The cost is £45 plus postage.

Do contact me if you would like one to makes it way into your home.

I’m so sorry but I’m only posting to the UK at this time.

Miss you terribly


Workshop in a Box – Patchwood Tenements

A gorgeous box of goodies that will arrive through the post!

Aimed at stitchers who have a love of making.

I’m really delighted to be offering these gorgeous Patchwood Tenements as a Workshop in a Box – everything you need to make this wee ‘Tenement Close’.

I first designed them for a workshop that was being held at Edinburgh City Art Centre a few years ago. The brief was ‘iconic Edinburgh’ so I decided to create these rather lovely little rows of tenements. It was rather perfect as we looked out the windows of our workshop right over the roofs of Edinburgh Auld Toun.

Everything you need to make a wee ‘Tenement Close’ made from hand stitched wooden patches

My aim for these boxes is for them to fall somewhere between an inspiration pack (where materials are provided with no guidance for using them) and a kit (where there are step-by-step instructions and everyone makes the same). Because of the nature of this one – it definitely falls nearer the ‘kit’ form but you will find that I have included suggestions for how you can change things around a bit and make it your own. Not least you will start off personalising it by choosing your own colours.

Please note that PAINT IS NOT INCLUDED in the box.

I thought you would want to choose your own paint to co-ordinate with your own colour schemes. I use matt emulsion ‘Match Pots’ from the DIY store, available very cheaply in every colour imaginable! You can also use acrylic craft paint.

A delicious collection of vintage ephemera

The Materials

In my own art practice I love using old, collected, washed & worn. I’m in love with vintage materials and papers, wondering about the lives they lived before coming to me. I’ve had great fun collecting together this little collection of papers & ephemera for you to use in this project.

I’ve included some vintage newspaper & book cuttings for you to cut out letters for your ‘Ransom Note’ words. I’ve cut numbers from magazine & book pages, maps and a gorgeous 1930s ledger book.

Papers include old music papers bought from flea markets, maps old & not so old that I can’t quite resist but seldom personally use. I’ve included an old knitting pattern (these somehow just find their way to me), a dictionary page  and an old recipe and other bits & pieces. These can be used for windows, doors & roofs.

I’ve rummaged around and included a scrap of old tape measure, an old bus ticket –oh how these bring back memories, not only of shopping trips to Dundee but of playing bus conductors, ½ a postcard (sorry I didn’t have enough for a whole one)  and other bits for you to use as doors and roofs. The snap fastener card is a copy I’m afraid – but it’s so gorgeous for roofs that I wanted to include. The snap fasteners are vintage though from an old brown cardboard box full of them.

The floral fabric is 1940s – French or German and the tweed is from my mother in law’s stash. Cutting that up actually brought a wee tear to my eye, not in the cutting but in the memories. She had A LOT of tweed and now it’s mine and I’m happy to share!

Windows made from maps, numbers from an old ledger

I have prepared everything in the box myself, as I would for a workshop and I’m really excited at the thought of people rummaging through it! I had such wonderful feedback on the presentation of previous Workshops in a Box, this is SO important to me. My aim is to delight & inspire, to keep packaging simple and re-usable…. but also gorgeously beautiful!

A vintage bus ticket door & lolly stick roof

You’ll receive four wooden ‘patches’, Making Notes and all the materials & tools required to make your  Patchwood Tenements with the exception of paint. The stitching holes are pre-drilled, ready for you to start assembling.

Now there’s a story behind the drilling – my husband took early retirement this summer and as he’s a bit blimmin brilliant he’s made me a drilling machine. So for the first time the holes will be drilled, not by me, but by my wonderful little machine. That’s what’s made this Workshop in a Box possible actually – I’d never have attempted to drill these by hand. It’s still not fast mind you, each wee ‘Tenement Close’ takes an hour to drill!

Before you can stitch through the wooden patches, tiny holes must be drilled.

There is, of course, a story behind why I wanted to stitch wood in the first place, a bit long to tell here, but it’s to do with mixing up some of the stereotypical domestic roles – taking a traditionally ‘female’ role of sewing and working it in a traditionally ‘male’ material. My workshops are always developments from my own personal art practice – read more about my series of Patchwood Samplers.

And of course there’s a washing line strung between temenents


Stands on a shelf or can hang on the wall

To Order

There are a limited number of 20 Patchwood Tenement boxes available before Christmas and most of these have been pre-ordered but there are a very few still available if you are quick off the mark! Don’t despair though I will be offering more of these at the end of Jan 2021. The cost of the box is £55 plus UK postage of £3.00.

You can order a box now by contacting me by email. As always, it’s on a first come first served basis and payment will be by by Paypal or Bank transfer. I hope to have these posted out by 2nd December so plenty of time if you are thinking of Christmas pressies! The finished ‘Tenement Close’ measures 28 x 20cm.

So sorry but I’m not sending these overseas!

I hope you love it and I can’t wait to see the results!


A Wonderfully Festive Workshop in a Box 2020

A gorgeous box of goodies that will arrive through the post!

Aimed at stitchers who have a love of making.

Especially for those who missed out last year – another chance to order this beautifully festive Patchwood Christmas Tree Workshop in a Box. I’m now taking pre-orders but be warned and be super quick because initially there will only be eighteen boxes available

I LOVE the idea of you creating this lovely seasonal wall piece that you will enjoy bringing out year after year!

All the materials & help you need to create a gorgeous Patchwood Christmas Tree

My aim for these boxes is for them to fall somewhere between an inspiration pack (where materials are provided with no guidance for using them) and a kit (where there are step-by-step instructions and everyone makes the same). Because of the nature of this one – it definitely falls nearer the ‘kit’ form but you will find that I have included suggestions for how you can change things around a bit and make it your own. Not least you will start off personalising it by choosing your own colours.

Please note that PAINT IS NOT INCLUDED in the box.

I thought you would want to choose your own paint to co-ordinate with your own colour schemes. I use matt emulsion ‘Match Pots’ from the DIY store, available very cheaply in every colour imaginable!

You could even go metallic & glittery if you wish… just don’t tell me! Rumour has it that every December I frisk my workshop participants  to make sure they’re not trying to smuggle glitter into my class!! (Oh to have the opportunity to do that this year!) This may or may not be true but I do have a serious ‘bling’ phobia. However even I will make an exception for this and admit that a wee bit of added shimmer might not be a bad thing! (Not included in the box though because I just can’t!)

I use emulsion match pots from the DIY store. Cheap to buy in every colour imaginable.

The Materials

In my own art practice the theme of my work always suggests the materials that I use. These are generally old, collected, washed & worn. I have an absolute passion for vintage materials so this project is highly unusual for me in that it mostly uses ‘new’.

Why?

Because I’ve taken my favourite patches from four years of making Patchwood Christmas Trees and brought them altogether in the design of this tree. Although I prefer to use vintage treasures wherever I possibly can, it dawned on me that my favourite Christmas Tree patches were actually made from new bits from craft stores. Yikes I never thought I would utter these words – but in this instance it’s absolutely true!

But true to form, I have  managed to include some vintage treasures such as: Vintage text – an old book page, newspaper & magazine cuttings for you to cut out letters to use ‘Ransom Note’ style, vintage fabric scraps and other little bits & pieces.

Christmas stocking buttons, the cutest little envelope. brown luggage labels, cinnamon sticks and ‘Ransom Style’ lettering – love, love, love!

I have prepared everything in the box myself, as I would for a workshop and I’m really excited at the thought of people rummaging through it! I had such wonderful feedback on the presentation of last year’s Christmas Tree Workshop in a Box, this is SO important to me. My aim is to delight & inspire, to keep packaging simple and re-usable…. but also gorgeously beautiful!

Gorgeous vintage fabric tied up in string.

You’ll receive seven wooden ‘patches’ and all the materials and tools required to make your  Patchwood Christmas Tree with, as I said earlier, the exception of paint. The stitching holes are pre-drilled, ready for you to start assembling. I don’t pretend for a minute that they are perfect. Participants in my workshops always think that I drill perfectly uniform holes and I am very happy to point out the wonky bits. Wood doesn’t always behave exactly as you wish and the grain means that sometimes the drill is pushed out of line. To me this is the point of it – part of the anomaly of trying to ‘sew’ wood. But be reassured – they are drilled to the same standard as I would when working on pieces for selling or commission.

There is, of course, a story behind why I wanted to stitch wood in the first place, a bit long to tell here, but it’s to do with mixing up some of the stereotypical domestic roles – taking a traditionally ‘female’ role of sewing and working it in a traditionally ‘male’ material. My workshops are always developments from my own personal art practice – read more about my series of Patchwood Samplers.

Before you can stitch through the wooden patches, tiny holes must be drilled. I’ve drilled A LOT of holes!


You’ll stitch your patches of wood together (they are glued first) and then embellish each patch. You will actually stitch this little christmas tree through the wood.


A most glorious wreath made from scrippy scraps of gingham attached to the patch by French Knots…actually stitched through the wood! Oh and a page from a vintage copy of A Christmas Carol.

To Order

There will be a limited number of 18 Patchwood Christmas Tree boxes available and I will start posting them out on Monday 9th November and will post throughout that week. They won’t take too long to make so there will be plenty of time for you to complete and get them hanging on your wall for Christmas.

You can pre-order a box now by contacting me by email. It will be on a first come first served basis but depending on the response I may open a waiting list and make more available. I’m not taking payment just yet but it will be by by Paypal or Bank transfer.

The cost of the box is £55 plus UK postage of £3.00

I can ship overseas at cost but personally I think postal rates are pretty prohibitive. Also if a parcel does get ‘lost’ on it’s way overseas then I will reimburse the cost of the box but sorry I can’t reimburse the postage.

I hope you love it and I can’t wait to see pictures of the results!


Summer Stitching – a new Workshop in a Box

SO SORRY (except I’m kinda delighted) BUT THESE ARE NOW SOLD OUT

A gorgeous box of goodies that will arrive through the post!

Aimed at stitchers who have a love of making.

So at long last it’s time (or some would say way past time) to launch my third Workshop in a Box and I’m rather hoping that you’re going to love it. Pre-orders open on Tuesday 21st July for this beautifully uplifting Floral Summer Sampler.

Those of you who have already bought one of my boxes will know that they fall somewhere between an inspiration pack (where materials are provided with no guidance for using them) and a kit (where there are step-by-step instructions and everyone makes the same). I provide all the materials for making this sampler along with ‘Making Notes’, a chart and photographs but I also encourage you to go ‘off piste’, to change things around and make it your own.


Available August 2020 – Floral Summer Sampler

To inspire & delight

The aim of these boxes is a simple one – to inspire & delight – in fact it’s become a bit of a mission statement.

I prepare everything in the box myself, as I would for a workshop and I love the thought of people rummaging through it!

‘Omg I’ve just opened your workshop in a box, which arrived this morning
I cried
It is quite possibly the most beautiful and beautifully packed box of bits that I’ve ever received
I spent ages looking at everything, and then carefully packed it all up again
And later I’m going to unpack it a second time’
A message from a happy customer who made me smile (you know who you are!)
 
The prep is completely ‘low tech’, with everything done by hand which is incredibly time consuming, intensely satisfying and, in my opinion, rather beautiful. This is just one of the reasons why numbers are limited.
Tapes are typed by hand on my vintage typewriter that belonged to my mother-in-law.

Used, washed & worn

If you know anything about me, you will know that my passion is in using materials that are used, washed & worn.  There is an energy & vibrancy in old textiles, we may never know where they came from, we may never know their stories but they capture our imagination and conjure up pictures in our minds and stir up emotions in our heart.

Wherever possible I use vintage materials in all of my Workshops in a Box.  However this does mean that there may be marks on some of the fabrics, or they may be faded or slightly damaged. I only include pieces that I would choose to work with myself – but be warned, I make a bee-line for the wonky and imperfect!

The materials in this box include a piece of hand stitched vintage quilt to use as your background – this is well washed and worn and the filling is gloriously uneven! There are some beautiful 1940s French (or maybe German) floral fabric washed so often that it’s the softest of soft and beautiful vintage floral linen that was gifted to me by Linnies Pinnies & Bags. Scraps left over from her makes because she shares my belief that nothing should be wasted. There are fragments of ribbon made from remnants from Indian sari manufacture and vintage mother of pearl buttons, some a bit bashed, but all the more beautiful for it. Other little bits & pieces are there to make you smile.


Inspired by a collection of Kensitas silk flowers

Inspiration

This sampler was inspired by a small collection of Kensitas silk flowers that have been in my possession for a few years. Although I regularly admire them and fondly stroke them I’d never quite got round to actually using them (sound familiar?). I came across them during an early lockdown clear out (again sound familiar?) and decided that they were far too beautiful and colourful to stay hidden away and that it was time to bring them to life once more.

What are Kensitas silks?

These woven silk flowers were given away free in the 1930s with Kensitas cigarettes. There were three sizes apparently the small ones being given away with packs of 10 cigarettes, medium (that I have used here) with packs of 20 and there were also larger postcard sized ones given away with boxes of 50 though I’ve never seen any of these. One silk flower is included in each box – it’ll be a random selection of reds or blues – all of them very beautiful.


The Kensitas silk gave me my starting point and then flowers just started popping up everywhere!

I’m so hoping that you’ll enjoy using bits & pieces that I’ve lovingly hoarded over the years but I also that you’ll personalise your own sampler by adding bits from your own stash and using some of your favourite stitches. The possibilities are endless.

Many of my followers on social media and in person are already enthusiastic and often experienced stitchers so this box is aimed at them. Anyone who is not familiar with any of the stitches used can look for online tutorials, or even better in my opinion, invest in an embroidery stitch book. I love collecting vintage of course and still use my very first sewing book “Embroidery Stitches’ by Barbara Snook.


Flowers made from old sari silk

The finished dimensions are around 22 x 32cm – don’t expect straight edges! The picture shows mine on an A4 clipboard (a favourite and very easy way to display) but please note that the clipboard is NOT INCLUDED ( mainly because it won’t fit in the box!) I have included two small bulldog clips for hanging – genuinely another favourite method of mine!


I share my designs and stitches used in the making notes

To Order

There will be a limited number of 40 Floral Summer Sampler boxes available and I will be posting them out in small batches from 3rd August and throughout that week. You can pre-order a box from today Tuesday 21st July by contacting me by email. Payment will be by Paypal or BACS.

The cost of the box is £45 plus UK postage of £3.00

I am so sorry but I am currently not posting overseas. I know this will disappoint but I’ve had a couple of parcels go missing over the last few months so I’m afraid UK only this time around.

I hope you love it and I can’t wait to see pictures of the results!


A tale of two rather gorgeous textile workshops

Crikey it’s blowing a gale and lashing rain outside, so it seems like a very good day to curl up and update the workshops on my website. Long overdue the little voice in my head is admonishing me and what can I say, for once it’s totally right. But I’m here now and have some really lovely workshops lined up over the next few months.

Firstly (and really excitingly) I’m going to be teaching in a wonderful new (to me) venue in April. I’m just thrilled to be teaching at the Wemyss School of Needlework in the tiny village of Coaltown-of-Wemyss in Fife. There are so many stories behind this wonderful school and I have a very personal connection to it as my ex mother in law Mary Birrell was ‘mistress’ at the school for 42 years. She followed in the footsteps of her great grandmother, Mary Webster, who was the very first mistress of the school when it opened in 1877. As a toddler, my daughter (and Michael, her teddy) used to spend many an afternoon there charming visitors, totally at home in the ‘skewing skool’ as she used to call it.

Imagine spending a day stitching surrounded by (Hi)Stories – not to mention beautiful threads & wools

Stories from the Scullery

Wemyss School of Needlework, Fife

Saturday 4th April

This is a gorgeous day of ‘slow stitching’, nostalgia and sharing stories. This workshop is perfect for lovers of ‘vintage’ especially those who have childhood memories of licking cake mixture out of the mixing bowl and the smell of home baking and for those who would rather be distracted from the task of Spring Cleaning and put their time to much better use – and sew about spring cleaning

We’ll spend six glorious hours designing and creating a gorgeous textile collage inspired by old recipes and pages from my precious domestic science jotter. I’ll be raiding my supplies from my studio, The Purple Thread Shed, and will provide a fabulous selection of vintage materials for you to use throughout the day. I LOVE using old & used materials so I’ll be looking out boxes of old embroidered table linens, vintage cotton fabrics, some old quilt fragments, woollen blanket and whatever else comes to hand during my rummaging.

We’ll print pages from my precious domestic science jotter onto calico

We’ll start the day by printing text from my jotter and recipes onto calico using an inkjet printer. If you’ve never done this before I warn you, it’s completely addictive. There are some wonderful pages to choose from, some real little gems that will bring inspiration and a real story to your piece. If you have some very special kitchen inspired handwriting such as granny’s favourite scone recipe you can, of course, bring it along to copy.

We’ll use this printed fabric as a starting point to piece together a scrappy collage of old and used fabrics.  This is a lovely intuitive process and be warned – it will take much longer than you think! I’ll help you along the way and then you’ll be ready to start the lovely process of slow hand stitching.

I’ll help you create a beautifully scrappy ground ready for hand stitching

I’ll encourage you to let this become a relaxed and organic process. I’ll show you how to highlight chosen words and phrases from your text with stitch and we can add further text using a typewriter to print on tapes. I encourage people just to start stitching. Once you get started, ideas will grow from there – I promise! I’ll help you to create balance and flow in your design through your stitching and bring all of these scrappy little patches together as one gorgeous piece.

Details from two rather gorgeous finished collages

Don’t worry if you’re not an experienced stitcher – running stitch and cross stitch are all you need but you can, of course, be more adventurous and I’ll happily share some of my favourite stitches. Neat perfect stitching is not the order of the day, a love of things old, washed and worn and making lovely personal ‘marks’ with needle and thread most definitely is!

You’ll be inspired by fabrics that have been used, washed and worn

Warning! (Who knew there would be so much warning required) Don’t for one minute expect to finish this on the day – hand stitching is really slow! However you will leave with a gorgeous project and all the ideas that you need to continue working on it in your own time at home. I’ll give you ideas for how you can hang your finished piece as it is and show you how framing will change the look completely.

Everything you need for the day is provided (apart from lunch) but if you may wish to use some of your own special bits & pieces to make your collage even more of a personal story – I’ll give you ideas of what to bring on booking.

This workshop costs £70 for the day. Drop me a line to grab your space at our rather wonderful sewing table or find out more.

Laundry Tales

The Restoration Yard, Dalkeith Country Park

Saturday 23rd May

I’m in love with that gorgeous red stripe in the vintage mangle cloth

With the wonderful weather we have come to expect in May (we kind of expect wonderful weather every summer don’t we? God bless us) thoughts will have well and truly turned to all things laundry. And when I say laundry I do, of course, mean  sewing about laundry.

The background to your collage will be a piece of old ‘mangle cloth’ – beautiful linen fabric with that gorgeous red (or blue) stripe. If red’s not your thing, you can use plain linen or bring along a piece of your own.

Once more we’ll be inspired by domestic science notes, this time flicking the pages to those on starching, washing & ironing. There are Rules for Ironing (who knew) everything from tablecloths, to blouses to frilled pillowcases and instructions for ‘pegging out’ – I hope you knew to ‘stand with your back to the wind’! We’ll start by printing some of this rather delicious handwriting onto calico and this will become the inspiration behind your piece.

We’ll use this printed fabric as a starting point to piece together a scrappy collage of old and used fabrics. You’ll be working with a fabulous selection of old table linens and other vintage materials from my studio. By using old and used materials we are bringing their stories to the piece too!

Creating a collage inspired by some of my very favourite things
You’ll create a gloriously scrappy collage from materials that are themselves used, washed & worn

Once you’ve created your ground you’ll start pulling it all together through the lovely process of slow hand-stitching. I’ll encourage you to let this become a relaxed and organic process using some old mending and needlework samples from my collection as inspiration. I’ll show you how to highlight chosen words and phrases from your text with stitch and how to add hand stitched ‘sketches’ to your work.

Hand made wooden clothes pegs ‘sketched’ with needle & thread

Don’t worry if you’re not an experienced stitcher – running stitch and cross stitch are all you need but you can, of course, be more adventurous. A love of all things vintage, of old, washed and worn is much more important.

You absolutely won’t finish this on the day but you’ll leave with a gorgeous project that you can stitch while you spend lazy summer days in the garden (oh there’s an idea for another workshop!)

The addition of hand stitching starts to pull your story together Details of finished collage

Absolutely everything you need will be provided (apart from lunch) but I will give you some ideas of bits & pieces you could bring to create a truly personal laundry tale.

This workshop costs £70 for the day. Drop me a line to grab your space at our rather wonderful sewing table or find out more. I’ll also be teaching this workshop at Needle & Thread workshops in Lincolnshire in October – find out more.

These are just two of the workshops I’ll be teaching this year. You can check out my full programme at The Purple Thread Shed Takes to the road

I hope to see you sometime soon!

A Wonderfully Festive Workshop in a Box

A gorgeous box of goodies that will arrive through the post!

Aimed at stitchers who have a love of making.

ALL SOLD OUT I’M AFRAID – well actually I’m delighted!

I was completely overwhelmed by the popularity of my first Workshop in a Box and just thrilled by people’s responses as they received their gorgeous packages through the post. So I’m totally excited to announce that pre-orders are will open on Friday 1st November for my  second: my beautifully festive Patchwood Christmas Tree.

I LOVE the idea of you creating this lovely seasonal wall piece that you will enjoy bringing out year after year!

All the materials & help you need to create a gorgeous Patchwood Christmas Tree

My aim for these boxes is for them to fall somewhere between an inspiration pack (where materials are provided with no guidance for using them) and a kit (where there are step-by-step instructions and everyone makes the same). Because of the nature of this one – it definitely falls nearer the ‘kit’ form but you will find that I have included suggestions for how you can change things around a bit and make it your own. Not least you will start off personalising it by choosing your own colours.

Please note that PAINT IS NOT INCLUDED in the box.

This was to help keep costs down (this box is already more expensive because of the sheer amount of time involved in preparation & some of the tools needed) but also because I thought you would want to choose your own colours. I use matt emulsion ‘Match Pots’ from the DIY store, available very cheaply in every colour imaginable.

You could even go metallic & glittery if you wish… just don’t tell me! Rumour has it that in December I frisk my workshop participants  to make sure they’re not trying to smuggle glitter into my class!! This may or may not be true but I do have a serious ‘bling’ phobia. However even I will make an exception for this and admit that a wee bit of added shimmer might not be a bad thing! (Not included in the box though because I just can’t!)

I use emulsion match pots from the DIY store. Cheap to buy in every colour imaginable.

The Materials

In my own art practice the theme of my work always suggests the materials that I use. These are generally old, collected, washed & worn. I have an absolute passion for vintage materials so this project is highly unusual for me in that it mostly uses ‘new’.

Why?

Because I’ve taken my favourite patches from four years of making Patchwood Christmas Trees and brought them altogether in the design of this tree. Although I prefer to use vintage treasures wherever I possibly can, it dawned on me that my favourite Christmas Tree patches were actually made from new bits from craft stores. Yikes I never thought I would utter these words – but in this instance it’s absolutely true!

But true to form, I have  managed to include some vintage treasures such as: Vintage text – an old book page, newspaper & magazine cuttings for you to cut out letters to use ‘Ransom Note’ style, vintage fabric scraps and other little bits & pieces.

Christmas stocking buttons, the cutest little envelope. brown luggage labels, cinnamon sticks and ‘Ransom Style’ lettering – love, love, love!

I have prepared everything in the box myself, as I would for a workshop and I’m really excited at the thought of people rummaging through it! I had such wonderful feedback on the presentation of my first Workshop in a Box, this is SO important to me. My aim is to keep packaging simple and re-usable…. but also rather beautiful!

Gorgeous vintage fabric tied up in string.

You’ll receive seven wooden ‘patches’ and all the materials and tools required to make your gorgeous Patchwood Christmas Tree with, as I said earlier, the exception of paint. I have pre-drilled all the stitching holes, ready for you to start assembling. These are done by hand and I don’t pretend for a minute that they are perfect. Participants in my workshops always think that I drill perfectly uniform holes and I am very happy to point out the wonky bits. Wood doesn’t always behave exactly as you wish and the grain means that sometimes the drill is pushed out of line. To me this is the point of it – part of the anomaly of trying to ‘sew’ wood. They are drilled as I would when working on pieces for selling or commission.

There is, of course, a story behind why I wanted to stitch wood in the first place, a bit long to tell here, but it’s to do with mixing up some of the stereotypical domestic roles – taking a traditionally ‘female’ role of sewing and working it in a traditionally ‘male’ material. My workshops are always developments from my own personal art practice – read more about my series of Patchwood Samplers.

Before you can stitch through the wooden patches, tiny holes must be drilled. I’ve drilled A LOT of holes!


You’ll stitch your patches of wood together (they are glued first) and then embellish each patch. You will actually stitch this little christmas tree through the wood.


A most glorious wreath made from scrippy scraps of gingham attached to the patch by French Knots…actually stitched through the wood! Oh and a page from a vintage copy of A Christmas Carol.

To Order

There will be a limited number of 30 Patchwood Christmas Tree boxes available and I will start posting them out on Monday 11th November and will post throughout that week. They won’t take too long to make so there will be plenty of time for you to complete and get them hanging on your wall for Christmas.

You can pre-order a box from Friday 1st November by contacting me by email. Payment will be by Paypal or Bank transfer.

The cost of the box is £45 plus UK postage of £3.00

I can ship overseas but the following postal rates will be added:

United States £9.10/ Europe £6.65 / Australia £9.80 / New Zealand £9.80

I hope you love it and I can’t wait to see pictures of the results!


Workshop in a Box

A gorgeous box of goodies that will arrive through the post!

Aimed at stitchers who have a love of making.

I first had the idea for my Workshop in a Box during a wonderfully relaxed holiday in Rome earlier this year. Within a few hours of first expressing the tiniest glimmer of an idea to my husband, I found myself with a list of month by month projects that I could develop. Three months down the line I have experimented and played and come up with my first gorgeous little package.

Ta dah – I’d love to introduce you to my first Workshop in a Box my – Scrappy Hand Stitch Sampler

My first Workshop in a Box – Scrappy Hand Stitch Sampler

My aim for these boxes is for them to fall somewhere between an inspiration pack (where materials are provided with no guidance for using them) and a kit (where there are step-by-step instructions and everyone makes the same). I have provided all the materials for making my sampler along with ‘Making Notes’, a chart and photographs. Many of my followers on social media and in person by attending my workshops are already enthusiastic and often experienced stitchers so this box is aimed at them. Anyone who is not familiar with any of the stitches used can look for online tutorials, or even better in my opinion, invest in an embroidery stitch book. I love collecting vintage of course and still use my very first sewing book “Embroidery Stitches’ by Barbara Snook. There are some really lovely books, vintage & new around.

I used some of my favourite vintage needlework books for reference

Everyone who knows me will know that I have a love of vintage, a love of using materials that are used, washed & worn. In so doing, we are not only preventing these beautiful treasures from ending up in landfill but we are also bringing their stories to our work. There is an energy & vibrancy in old textiles, we may never know where they came from, we may never know their stories but they capture our imagination and conjure up pictures in our minds and emotions in our heart. Wherever possible I will be using vintage materials in all of my Workshops in a Box, which is both challenging and exciting. Because of this there may be marks, or some of the fabrics may be faded or slightly damaged. I’ll be including the pieces that I would choose to work with myself – I usually make a bee line for the damaged bits as I know many of you do too!

I have prepared everything in the box myself, as I would for a workshop and I’m really excited at the thought of people rummaging through it!

There will be a limited number of 30 of this workshop available for now.

The Story of the materials in this box

Woollen Blanket

The sampler is worked on a woollen blanket ground. Found as a friend cleared out her mother’s cupboards. I’ve also included a spare bitty blanket to test out your stitching if you wish.

A stitch grid pattern

Printed on a page from a 1950s Woman magazine. It tears easily and is so much more pleasing than anything else!

A fragment of lace

From a big tangled box of tatting, crochet and lace pieces that I bought as a job lot from the Textile Tent at the Newark show ground. I’ve also included a few tiny scraps extra for you to use (or not) in this project. Just patch them on wherever you fancy!


A scrap of tape measure, an old Cash’s name tape, a fragment of lace & linen button – or use treasured ‘bits’ from your personal stash.

A scrap of tape measure

Also from an antique fair at Newark. I have a THING for tape measures, ever since I was tiny and called them ‘mithers’. This is slightly ironic as I can’t measure for toffee! You’ll have to excuse wonky lines!

Cash’s Name Tape

An Ebay treasure. Little bundles of tape in the original box. I have a fascination for Cash’s name tapes – I love that this one belonged to a stranger but you might have one of your own that you wish to use or substitute it for something from your stash!

A gorgeous fragment of quilt

Another find on Ebay – this is a phrase you will see a lot in future boxes! It’s a little scrap from a hand stitched antique Durham quilt. It was very scrappy so perfect for sharing.

Fabric patches

Now these are very special pieces. Antique Japanese scraps bought in the wonderfully amazing Asia Gallery in Aukland, New Zealand. This beautiful antique fabric, was found while rummaging amongst kimono, wonderful boro pieces and other most gorgeously special antique Asian treasures. This very special place may be on the other side of the world but I’d love to think I’ll return there sometime!

Fifteen boxes have blue fabric patches included & fifteen have a gorgeous green  & cream stripe – I honestly can’t tell you which I like best. Tell me which colour is your first choice and whether you are willing to accept the alternative when you order.

Two different but equally gorgeous striped antique Japanese fabric patches – blue or green

Buttons

I’ve absolutely no idea where these have come from. They’ve been collected over time, vintage mother of pearl as these are my favourite, especially when they are a bit bashed and marked through use. I also love and covet linen buttons but I never quite knew what to do with the ones with no holes in them until I came across instructions in a vintage book so I’ve popped one in!

Suffolk puffs

These are  from a hand stitched vintage bed cover made in old batik fabric. These are little extras that I have popped in – I didn’t include them in mine but you may wish to swap around a couple of patches to include one.

Stitch names

These are typed on bias binding. The tape is new but I’ve typed them myself using my mother in law’s old typewriter. I always love how some letters don’t quite come out right so no apologies that they may not be 100% perfect!

Tape typed with my mother in laws typewriter and a heading stitched with words by ‘The Lady Wolverton’

Calico patches

New fabric printed on my inkjet printer. There’s a choice of headings for the sampler including a little line that tickled me from the introduction of one of my vintage needlework books ‘Needlework For Student Teachers’ by Amy K Smith. the introduction is written by ‘The Lady Wolverton’ and is one of my favourite parts of the book. My copy of this gorgeous book belonged to Maria Davies of Taff’s Well near Cardiff and she has handwritten the date 1895 inside.

Threads

DMC Cotton Perle no 8 in numbers 413 (Grey), 321 (Red) and Ecru. The stranded cotton is also DMC number 321.

I’m so hoping that people will enjoy using all these bits & pieces that I have hoarded over the years but I also that they’ll personalise their samplers by adding bits from their own stash and by using their own favourite stitches. The possibilities are endless.

Follow my suggestions for gorgeous stitches or stitch your own favourites.

To Order

There will be a limited number of 30 Scrappy Hand Stitch Sampler boxes available and I will be posting them out from 1st October. You can pre-order a box from today Tuesday 24th September by contacting me by email. Payment will be by Paypal. If you do not have a Paypal account then let me know and we can arrange another method. Remember to tell me whether you would prefer blue or green antique fabric patches and whether you are willing to accept the other if your first choice is no longer available.

The cost of the box is £35 plus UK postage of £3.00

I can ship overseas but the following postal rates will be added:

United States £9.10/ Europe £6.65 / Australia £9.80 / New Zealand £9.80

I hope you love it and I can’t wait to see pictures of the results!